An even BIGGER update!
A lot has changed in the last few weeks! I'm sorry I didn't update sooner.

So. From my last blog, if you read it, you will know that I got the EasyVR shield working, detecting my inputs and displaying this on the screen. Well now he speaks!! Check out the below!
Electronics
I've really struggled with my EasyVR and my Music Maker shields stacked atop one another, and eventually I ruined my EasyVR trying to change the pinouts. There's two teeny tiny resistors on the back that you can allegedly move and re-solder in order to change the pins that the EasyVR uses. I needed to do this because the Music Maker shield and the EasyVR use the same pins - 12 and 13. (The Music Maker uses several more, but the EasyVR only uses two). But doing this was a bloody nightmare, I don't think I really have the equipment to do it because they're so small, and I burnt the board and was unable to solder across the holes, it was just a nightmare honestly. I had to order another one, but the problem remains that I cannot work out how to have two shields on one Arduino. So therefore we couldn't communicate between them easily.
Now I say easily - I am sure there is some way to tell your Arduino to "talk to this shield" and then "ok now talk to this one". There simply must be. It's something to do with shield selectors. Dunno what they are, tried to look it up, couldn't find anything particularly helpful on this subject. So, what is easier is two arduinos with a shield on each. This great idea was suggested by Evan, the creator of Bottango, which I will be using to animate Wheatley. There is a Discord channel which you can access through the Bottango website. What a great group of people!! And it WORKS!
Back Drum and supports
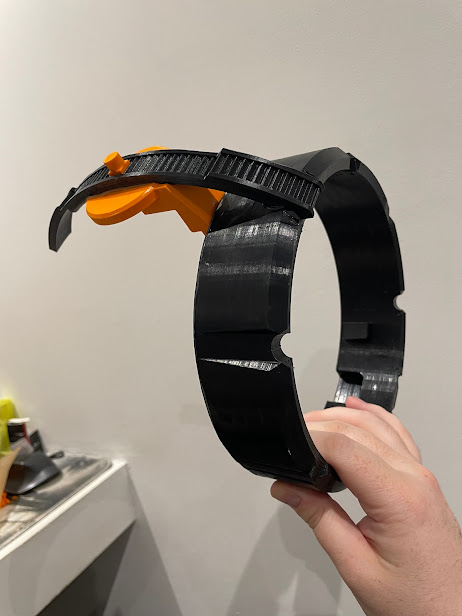
So the black round drum piece is in the back of the model. I attached the two orange arms, which are the sides of Wheatley, and then onto that I attached the black side rails which you can see above.

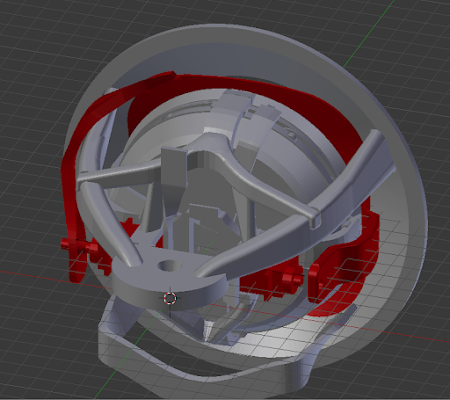
And then from there I attach the grey side panels. The top and bottom rail get glued to one side panel each and then I should be able to fit all the pieces together.

Painting

I thought after priming it with grey and a splash of white primer, it looked perfect and doesn't really need any further work on painting the body This is how it will be left!

And then I sprayed it with a gun metal spray I've had for yonks:

So I'm overall very pleased with how well all the painting has gone. After I've glued all the side quadrant panels on to the body, I will need to go over it again unfortunately, to make it consistent. Although the body is printed in four panels, it's actually supposed to be two panels that just wouldn't fit on my printer. So I will have to fill the gaps at the sides and then repaint it, but that's fine - I didn't want to attach them unpainted, so this is all according to my plan.
Eyelids
Especially the top eyelid which has a ridiculously shaped arm because of having to go around the front faceplate support. But it gets worse - I miscalculated the height of the servos - by 3mm! I'm so annoyed about this. So I had to print some height-rising support blocks for the servo which I have had to painstakingly glue to the housing, shown below:

So this works but then do you want more bad news? I thought so. One of the blocks on the right-hand side of the photo above slipped out. It still held the servo up just fine, but as you can see, it's very close to the iris arm on the right-hand side, and well, it slipped in such a way that the iris arm collided with it, preventing rotation and possibly damaging the model if it stayed there. So I've had to disassemble it all and remove the two servo support blocks. I've now designed this:

And this won't slip out of position, I promise! I hope... It's next to me printing right now.
The handles

The servos are teeny tiny, about the size of my finger, and they are actually built into the handle. So the handle will turn with the servo, and the servo horn will be fixed in place to the model. You can see the small orange caps I have printed and glued to the holes on the body, and then you can see the servos plugged into them (small black things). They're going to be painted grey like the body so they will look like part of the model by the time I'm done. They just feel flimsy. The rest of the model is very robust and solid but the handles are NOT at all. I'm concerned they won't even move. They're actually so small that I am having to cut the head off the cable and solder in three separate cables so that it's big enough to plug into my Arduino because at the moment it is not. But I also have to do that whilst the servos are in situ, because the cables are small enough to poke through the servo arm whereas the soldered cables will not. I cannot overstate how small these things are.


Hi, your project is very interesting and I was wondering if you were able to put more hours on it?
ReplyDelete